Overview
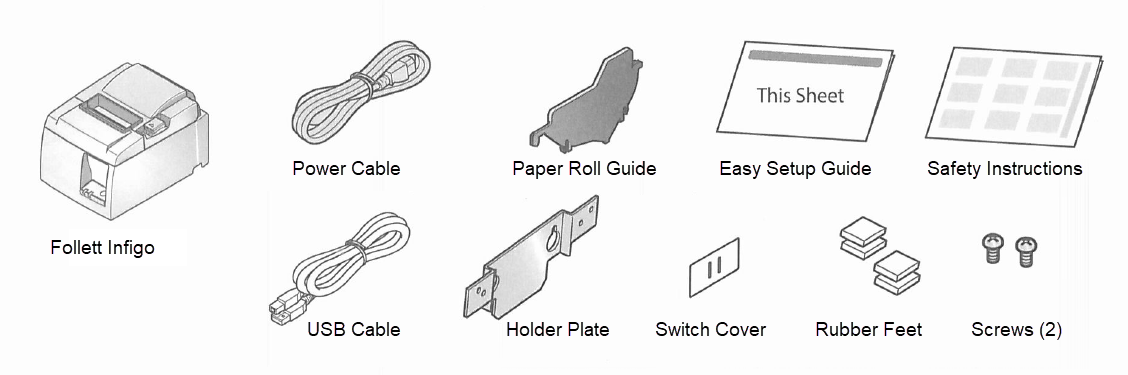
The Follett Infigo™ lets you easily print circulation and fine receipts. It includes a USB cable and mounting equipment.
Check the supplied accessories
Set up the Follett Infigo
- Install the Windows driver.
Important: Install the driver before connecting a USB cable. By installing the driver in advance, when a Windows PC/tablet is connected with Follett Infigo, a printer queue is automatically created via plug-and-play, and communication is enabled with the printer. - Download the TSP100 Windows driver "futurePRNT" .

Note: The Windows driveris included in futurePRNT. When futurePRNT is used, the printer settings can be configured and an operation test can be performed.
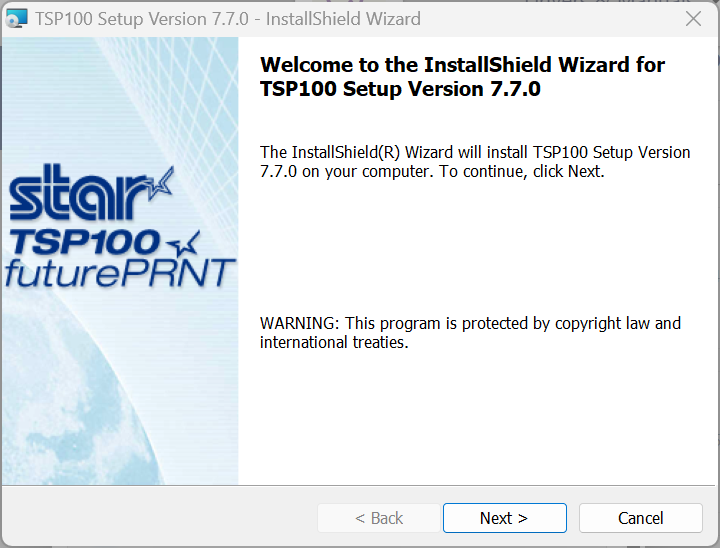
- In your Downloads folder, open the file tsp100_V770_Setup.EXE, then click Yes.
- Follow the wizard to install the software. Do not make any changes to the settings.
- Download the TSP100 Windows driver "futurePRNT" .
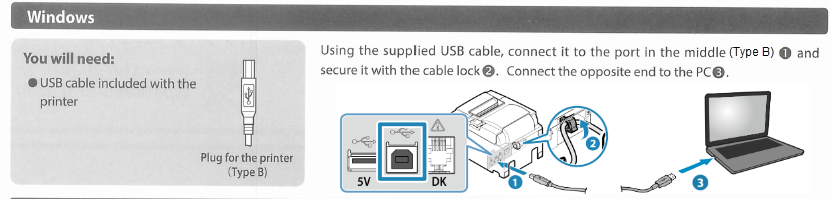
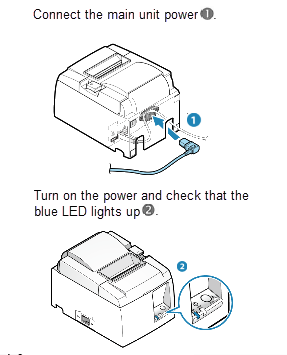
- After the driver is installed, connect a USB cable.
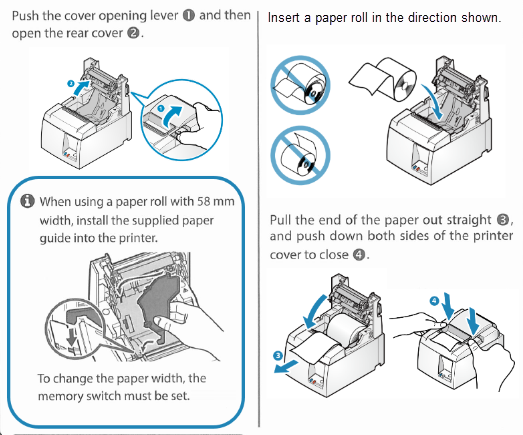
- Insert a paper roll.
- Turn the Follett Infigo on.
- Restart your device.
This completes the printer setup.
Set up the printer properties in Windows
- Select Start > Settings > Control Panel > Printers and Scanners.
- Locate and right-click Star TSP 100 Cutter (TSP 143).
- To set the Infigo as the default printer, click Set as Default Printer.
- Click Printing Preferences.
- Select the following settings:
Tab Settings Advanced - Set paper size to 72mm x Receipt.
- Click OK.
Layout Select Portrait. Paper/Quality - Select the following:
- Paper Source: FRICTION
- Media: 2 color paper
- Color: Color
- Click Apply.
- Click OK.
Configure Destiny
- Log in to Destiny as a Destiny Admin.
- Select Admin > Site Configuration > Receipts/Refund Notification.
Note: If you do not see Admin > Site Configuration, ask your Destiny or Site Administrator to configure the settings.
- UnderWhen generating current Check Outs/Fines receipts... and When generating Check In receipts..., next to Format, select Follett receipt printer.
Note: If you do not see this option, you may need to upgrade to the current version of Destiny.
- Click Save.
To print a test receipt:
- Select Circulation > Checkout.
- Select a patron.
- Click Print Receipt.
- In the printer pop-up, select the following settings:
- Destination: Star TSP 100 Cutter (TSP 143)
- Layout: Portrait
- Color: Color
- Under More Settings, select:
- Paper size: 72mm x Receipt
- Margins: None
Note: You may have to set the margin to Default, then change it back to None after you deselect the Headers and footers checkbox. - Options: Deselect the Headers and footers checkbox.
- Click Print.
Mount the Infigo vertically
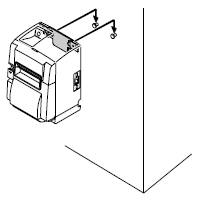
- Hold the Holder plate against the wall (or other vertical surface), and mark the location of the inner set of holes.
- Install the appropriate screws (not included) in the wall, leaving enough space behind the screw heads for the Holder plate.
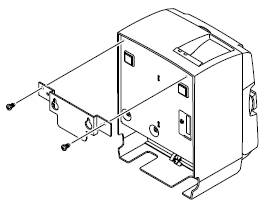
- Securely attach the Holder plate to the printer with the two screws (included).
- Position the printer over the screws on the wall, and then slide it downward to set it in place.
Click here to download the PDF.
Click here for the Follett Infigo Easy Setup Guide.