Check out items to patrons
The To Patron checkout option is ideal when students or teachers are checking out resources for their own use.
|
Note: To permanently assign a resource to a patron, update the Custodian on record using either Update Resources or Edit Item in the Catalog. |
The steps to check out a resource to a patron depend on whether the item is barcoded or not. You can check out barcoded items, consumables, and unbarcoded items to a patron in the same session. You can also do the following with checked-out resources:
To check out resources to a patron:
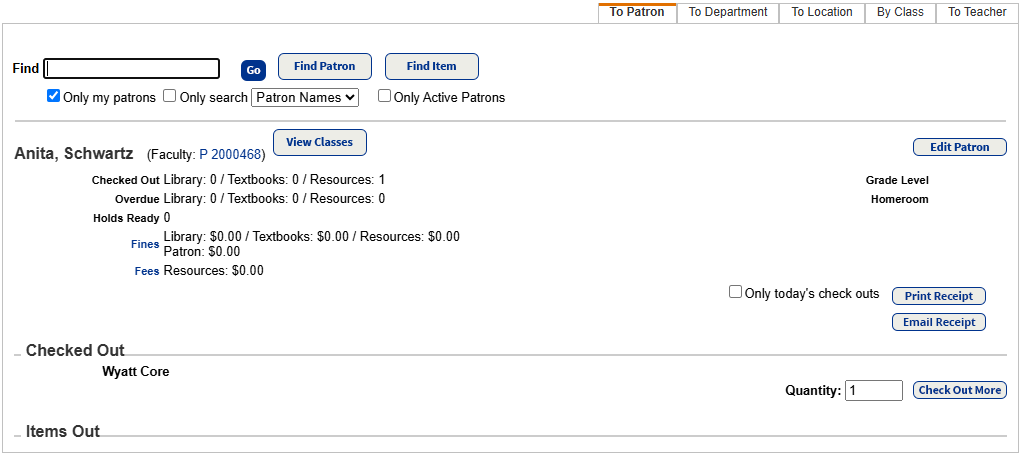
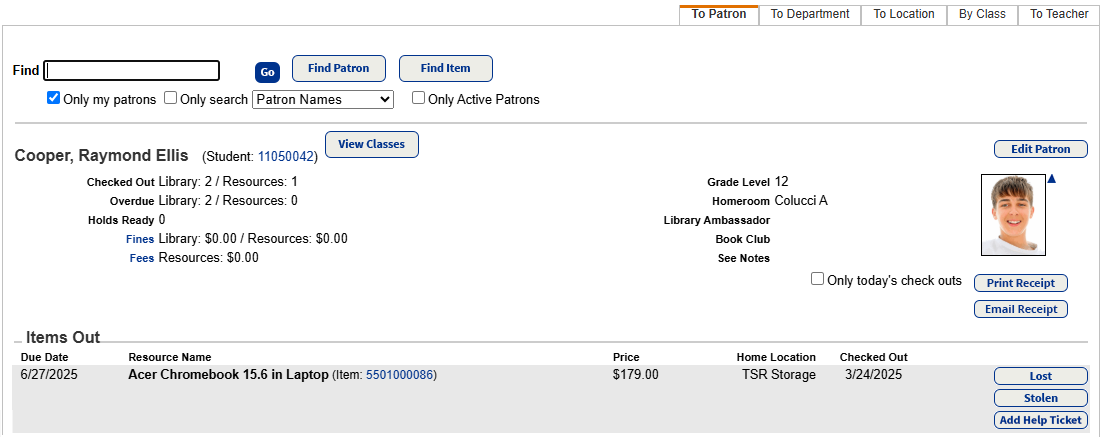
- Select Circulation > Check Out Items > To Patron tab.
- To search for a patron, scan or type the patron's barcode in the Find field. If a list of patrons appears, select the one you want.
- Use the following table to complete your task:
To check out… Then… A barcoded item, including containers
Note: Resources with included items can be circulated To Patron, as well as renewed. For example, if a mobile tablet cart with container items is checked out, all items are checked out or renewed at one time. Items that are part of a container cannot be checked out individually. Hence, if a tablet is part of a mobile tablet cart, a message states the transaction is blocked.
- In the Find field, scan or type the item barcode or name.
- If you type the barcode, click Go or Find Item.
- If you type the item name, find the item you want, and then click Check Out.
Notes:
- If a patron has fines, fees, or overdue items or if a copy has an In Quarantine status, you will receive a blocked transaction message.
- If the item has an associated digital signature agreement that was not signed, you will receive a blocked transaction message with a link to the agreement's signature form.
- Users with the Override resource blocks permission can bypass blocks.
- If you check out a resource with components, a pop-up lets you adjust the component quantities, if needed.
- Items included in a container cannot be individually checked out
- To edit the due date for the item in the Checked Out section, click Change Date. Select the new due date and whether it is for this item, this patron, or the rest of this session.
Unbarcoded resource or consumable
Notes: Before you can circulate unbarcoded and consumable items, your site must be configured correctly.
- Select Admin > Site Configuration > Circulation tab.
- Make sure the following checkboxes are selected: Allow unbarcoded resources to be checked out and Allow consumable resources to be checked out.

When resources are assigned the instructional classification of
Digital Material - Auto Circ (never barcode)
, they are automatically checked out if they are assigned to class sections; this occurs during the nightly Destiny update.Digital materials or consumables do not need to be checked in at the end of the loan period, as a nightly job deletes them automatically.
You can check in consumables early from Circulation > Patron Status; they are added back to the inventory with an Available status.
If students have digital resources checked out, the will see them in with links.
- In the Find field, type a keyword for the resource you want to check out.
Note: If the unbarcoded item is a textbook, you can also scan its ISBN. - Click Find Item.
- Do one of the following:
- If a list of results appears, next to the one you want to check out, enter a Quantity, and click Check Out.
- If the item is automatically checked out and you want to check out more of the items, type a Quantity, and then click Check Out More. A confirmation message appears. Click Yes to confirm.
- In the Find field, scan or type the item barcode or name.
- If you want to provide a receipt, do one of the following:
- To print a receipt: Click Print Receipt to open a printable PDF.
- To email a receipt:
- Click Email Receipt, and then select the email addresses to include.
- Click Send.
To customize receipts, see Set up receipts and refund notifications.
To use the email features in Destiny, the Destiny Administrator needs to set up the SMTP mail server.
- Receipts with product-specific fine data will honor the View library fines, View resource fines, View textbook fines, and View patron fines permissions. This means users will only see associated info on the receipt. For example, users with the View resource fines permission will only be able to see resource-related receipts.
Notes:
- To clear the completed checkout and begin checking out a new patron, click Reset Checkout.
Transfer items during checkout
An in-hand transfer is as follows: You scan an item assigned to another site in the district. Because your district enabled the Allow sites to receive by barcode scan
permission, you can transfer the resource to your site.
|
Notes:
|